# Group management
Working with a lot of users can be a headache, luckily 24sessions has a group functionality which makes you able to create groups of users who can have the same meeting or have the same booking link.
In this article, we will go over how to manage these groups and how to set them up optimally for your use case.
This article covers:
* [Changing group settings](#h_01G3GZEPKKVXNT9ZN8CXB0YGTX)
* [The different group roles](#h_01G3GZEVBE5S1ZKBSVM4NY16ZA)
* [Assigning a group role](#h_01G3GZ50FT6B8Y18QANR8YG2EZ)
* [Adding users to a group](#h_01G3GZF43JFREBPD11TPC58X37)
* [Removing users from a group](#h_01G3GZF96RKNS0ZDNJK4EN3F5J)
* [Adding meeting types to a group](#h_01G3H0362GS1R2Q6JCEPRBXJXC)
* [Removing meeting types from a group](#h_01G3H03CNXNHJ5V3T1JCR5WHE8)
If you're looking for instructions on how to create a group, you can find this information in the article [Add a new user or group.](https://24sessions.zendesk.com/hc/en-us/articles/4404416708497)
#### **Changing group settings**
When you have created a group, you can manage it by going to the Users & Groups section. Then click on the *Groups* tab. There, you will encounter all groups in the instance. To go to the settings of a group, simply click on its name. There you can change the group name and group link. The group link can be used to book a meeting with one of the users contained in the group. Under *Users,* you can view the users in the group, [change their group roles](#h_01G3GZ50FT6B8Y18QANR8YG2EZ) or remove them from the group. Under the tab *Meeting types,* you can view and remove meeting types that this group has access to.
#### **The different group roles**
Within the group settings, you can also edit the roles of the users in that group. There are group roles, these are different from the *global* roles in the sense that they're only effective within a group. You can assign users to be group managers or group operators.
*Group operators* have more permissions than regular users, they can plan meetings for other people in that group or set availability for other people. They can also access group reporting and the group's recordings.
*Group managers* can do even more: on top of what a group operator can do, they can also change the account settings of people in the group, invite users to the group and assign group roles.
For a complete overview of what each role within 24sessions can and cannot do, both on a global and group level, you can check [this page](https://www.24sessions.com/user-roles-table-en).
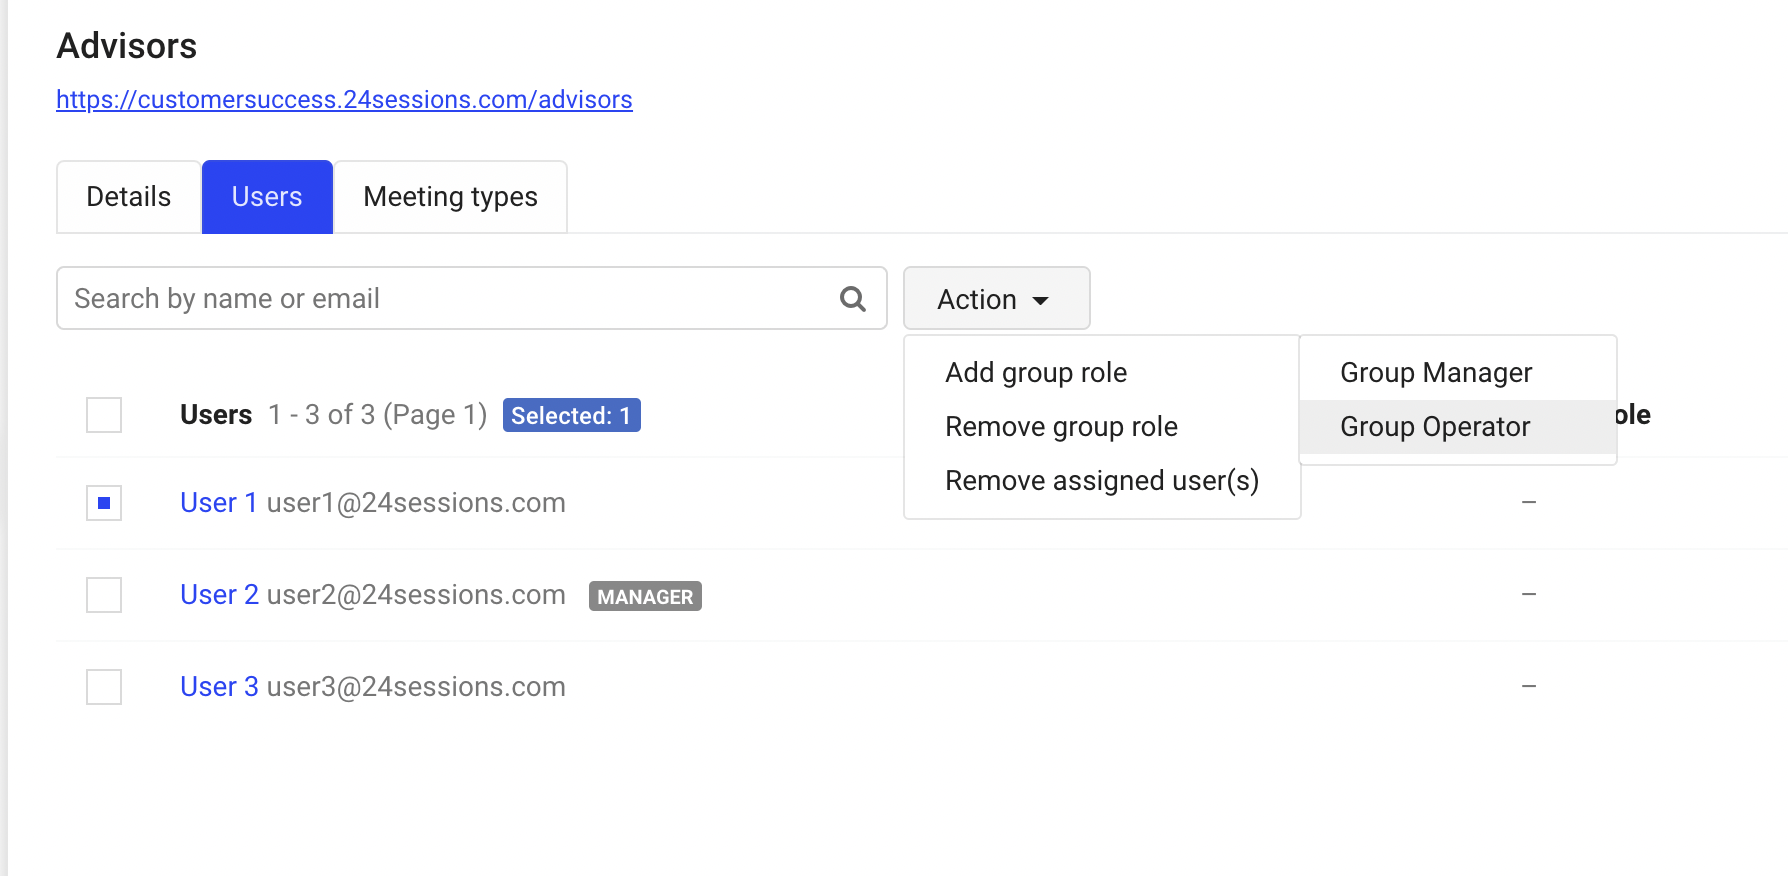
#### **Assigning a group role**
You can assign group roles from the group settings. Just click the tab *Users* and select any of the users you want to give a role to. Then, go to the *Action* dropdown menu and hover over *Add group role*. Then, click on one of the roles that pop up and you're set. If you ever want to remove group roles, you can also do this from the action dropdown menu, by selecting the users you want to remove the role of and clicking *Remove group role*.
#### **Adding users to a group**
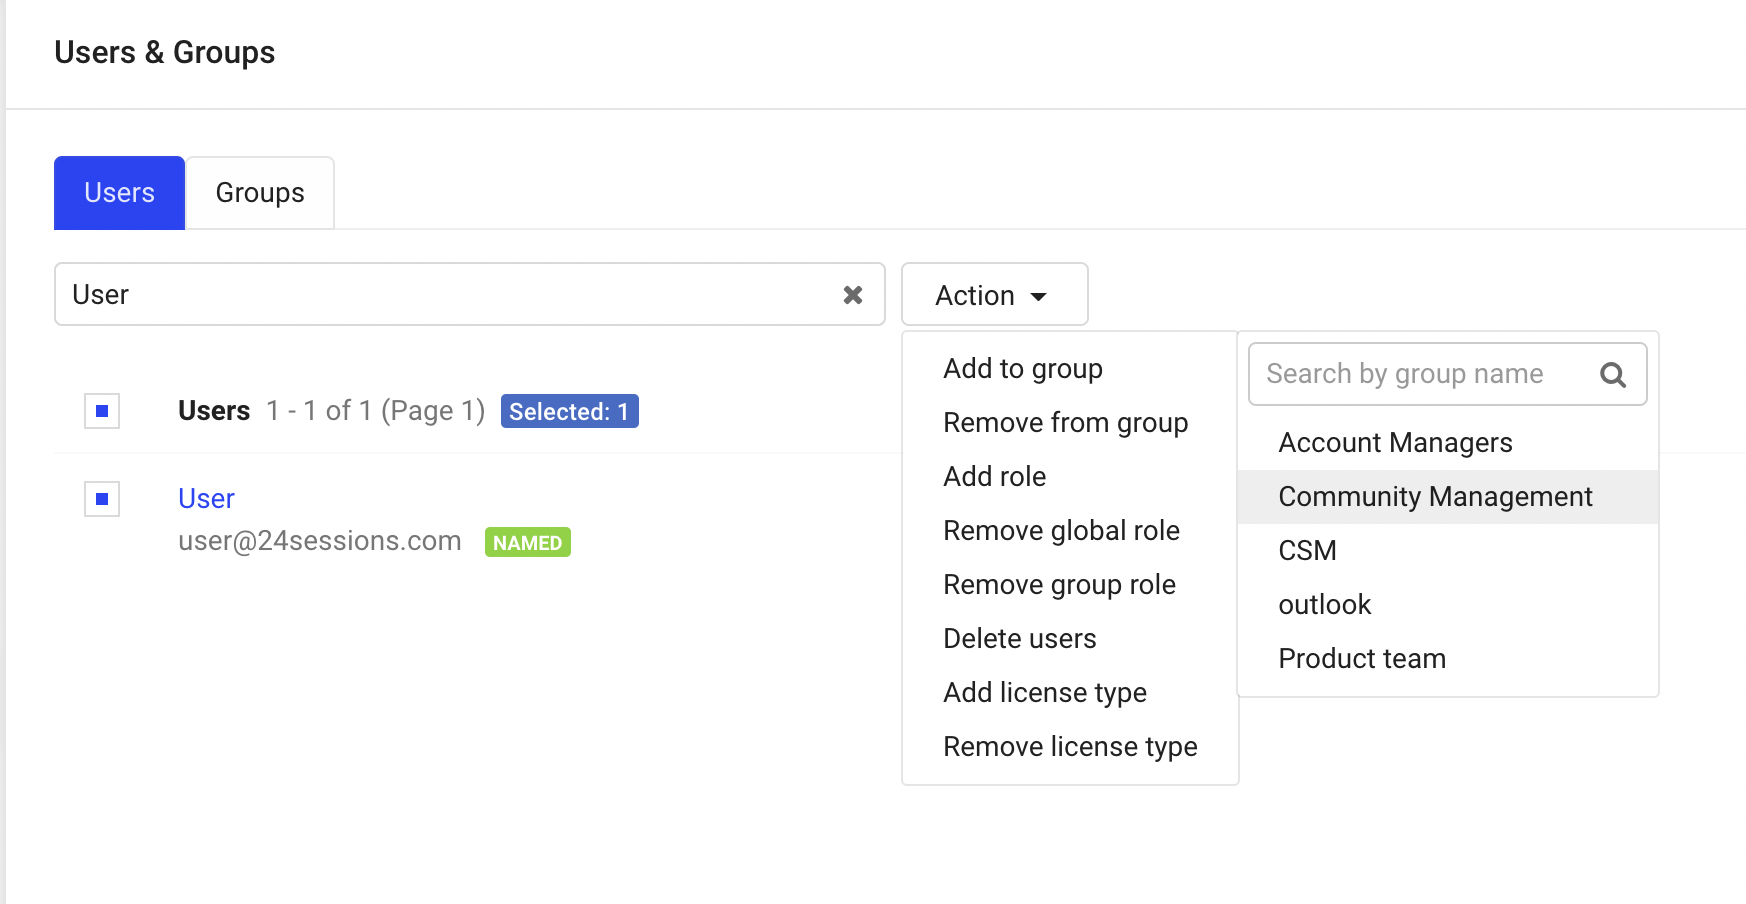
Adding users to a group can be done upon creation, but if you skipped this step or want to add users later, you can still add the users. You can not do this from the group settings, however. To add people to a group, go to *Users & Groups* and under the tab *Users* simply select the users you want to add to the group. After you have selected all the users you want to add to the group, go to the *Action* dropdown menu and hover over *Add to group*, then in the menu that pops up, click on the group you want to add the users to. If your group is not listed, you might want to use the search bar to look up the group.
After clicking on the group you want to add the users to, you will get an overview of all the users who will be added to the group. You can still click *Cancel* and make any changes if you deem this necessary. Otherwise, simply click *Add to group* and the users will be added to the group!
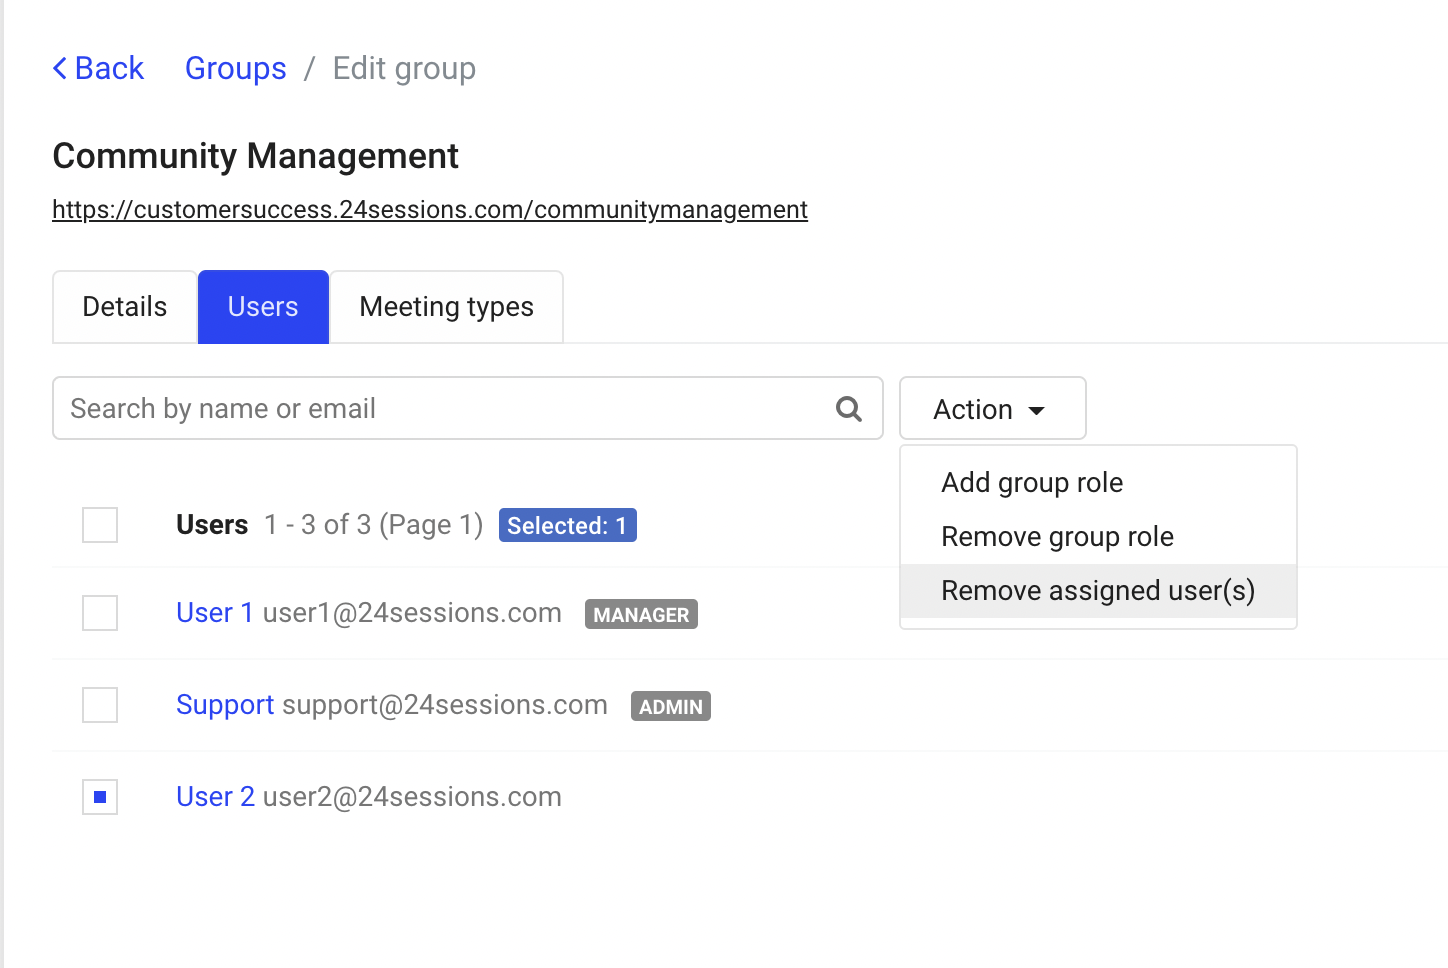
#### **Removing users from a group**
You can remove users from the group settings. Simply navigate to the *Users* tab and select the users you want to remove. Then, go to the *Action* dropdown menu and click *Remove assigned user(s)*, you will get a popup confirming the users that will be removed, you can then still click cancel and go back, or simply click *Yes* and the users will be removed from the group.
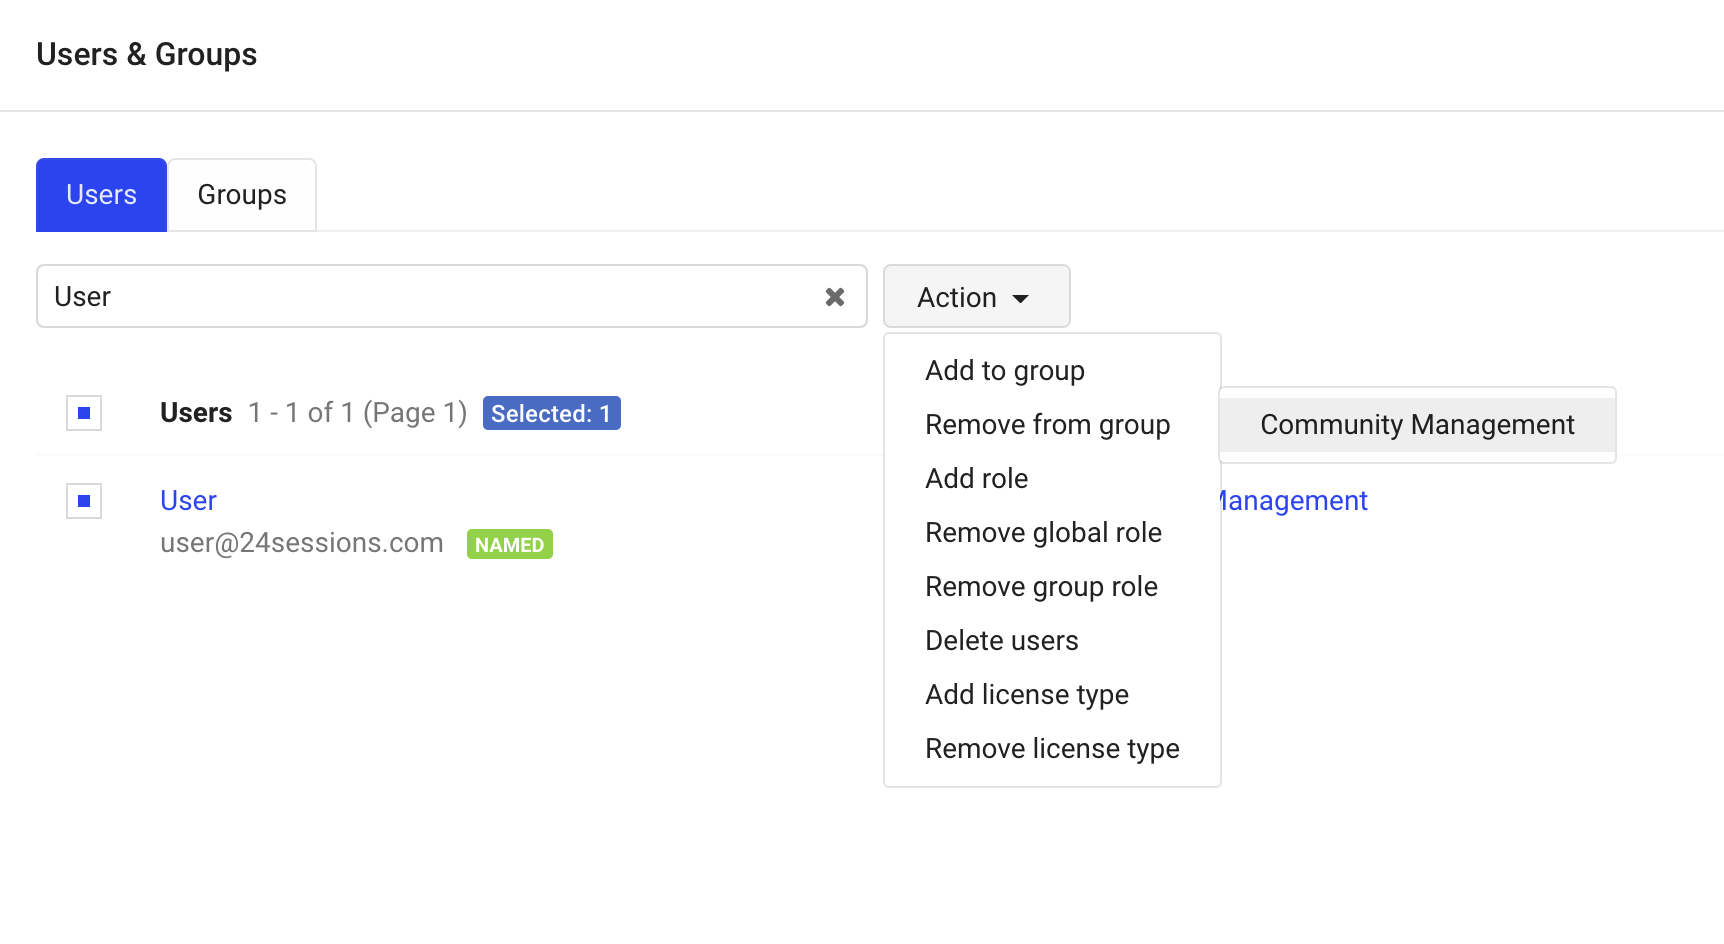
You can also remove users from a group by going to *Users & Groups*. There, simply select the users you want to remove from a group, go to the *Action* dropdown and hover over *Remove from group*, then select the group you want to remove the selected users from.
#### **Adding meeting types to a group**
Adding meeting types which a group can use can be done when you create the group, but if you want to change things up later, you follow these instructions to do so.
To add a meeting type to a group, you will have to go to the meeting type that you want the group to have. Navigate to meeting types, then click on the meeting type that should be added to the group. Then, open the setting *Who can host this meeting?* There, you can click on *Add users/groups,* a popup will appear. There you can go to the *Groups* tab, and select the group(s) you want to add this meeting type for.
Once selected, you can simply click *Add (x) groups*. After that, click *Save* and the meeting type is added to the group.
#### **Removing meeting types from a group**
Removing meeting types from a group can be done through the group settings. Navigate to the group's settings and go to the *Meeting types* tab. There you can select any of the meeting types you want to remove. Then, go to the *Action* dropdown menu and click *Remove assigned meeting type(s).*
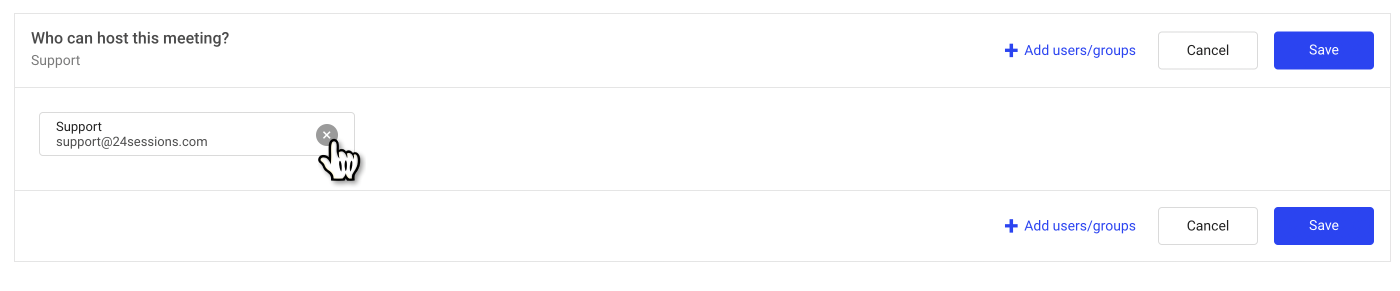
You can also remove meeting types from a group by going to the meeting type itself. Navigate to meeting types, then click on the meeting type that should be removed from the group. Then, open the setting *Who can host this meeting?* There you can simply click the x next to the group that should be removed. After that, simply click *Save* and the meeting type is now removed from the group!