# Using templates & personalisation
* [Templates](#h_01FA0EESGMKP1C3K3B81DRZC61)
* [Creating a template via the template manager](#h_01FA0EFB34XTXZKTDA4861XGHD)
* [Creating a template from a composed message](#h_01FA0EFEHYE8QNVYR8Y3WK7ZMR)
* [Using templates](#h_01FA0EFKZW4YZYBV4TFYV6BV3F)
* [Personalisation](#h_01FA0EFR7AFY3N0YJ1P0FTS4VG)
* [Using personalisation](#h_01FA0EFWKFGHZPTSVPG8D99YQM)
* [Single contacts](#h_01FA0EG1EBVWV1BK3M1G82NJAE)
* [Importing contacts](#h_01FA0EG76K581DZHJ4YW53GVA3)
* [Bulk messaging](#h_01FA0EGC37JTP07NTZ0TR6R6HK)
#### Templates
MessageBird allows you to store SMS templates for future use, which can be useful if you send out the same or similar texts often. Using templates can also help you avoid typos and increase your message consistency and recognition with your recipients. There are two ways of creating a template:
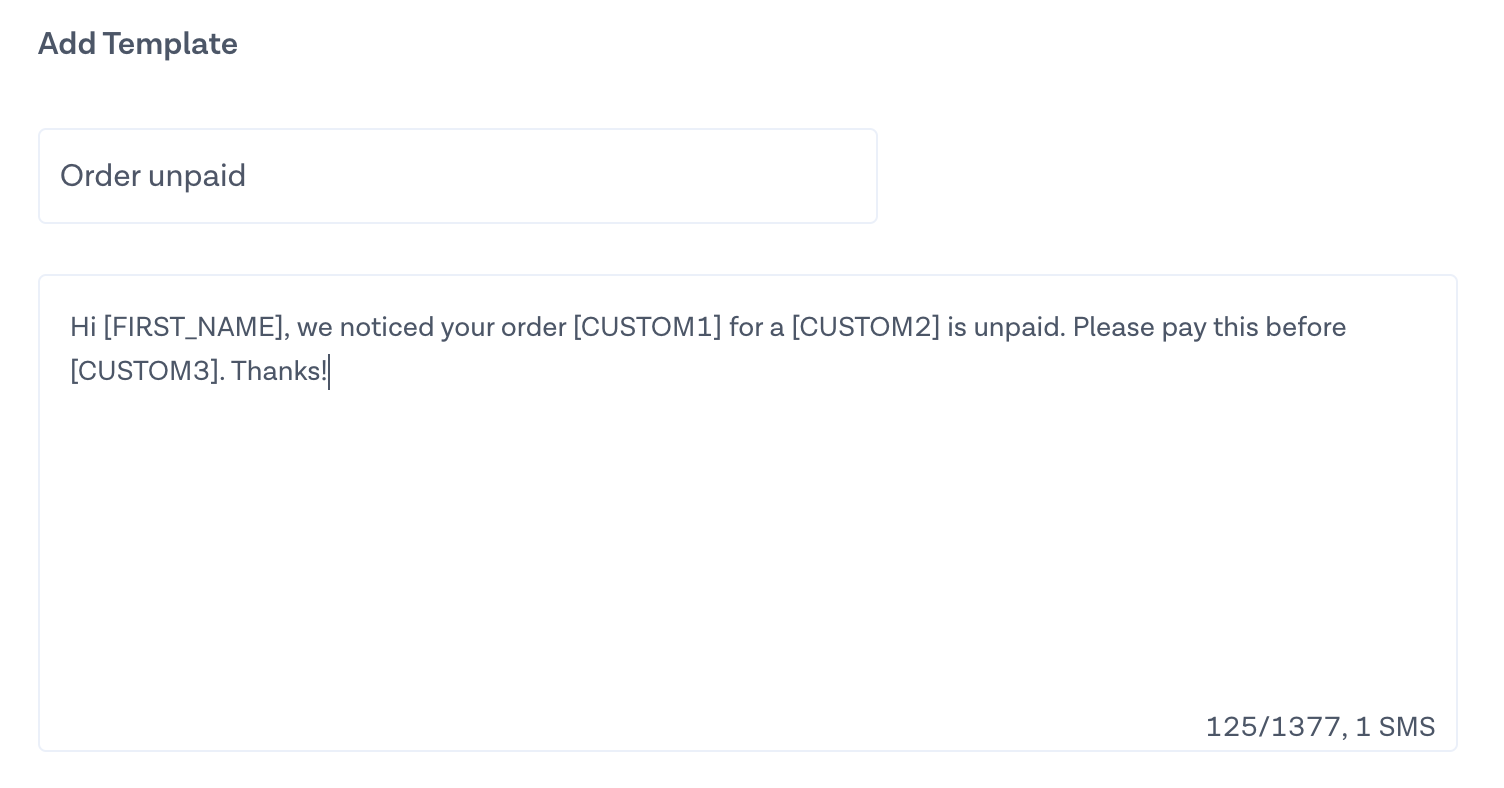
**Creating a template via the template manager**
Click [here,](https://dashboard.messagebird.com/en/templates) or click on your Workspace → Settings → Templates → '[Add template](https://dashboard.messagebird.com/en/templates)' in the top-right side of the Dashboard. Give your template a name so you can easily recognise it, now simply write down and personalise the message (read more below on personalisation). When ready, click 'Add' to save your template.
**Creating a template from a composed message**
When you are sending out a message via Campaign Builder, you will have the option to tick the box ‘Create a template based on this message’ when reaching your final step. A template will be created from the composed message.
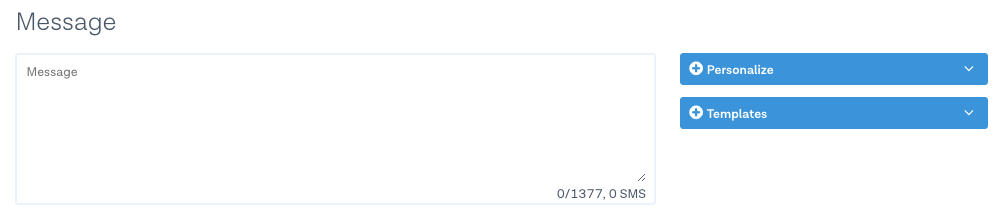
**Using templates**
When you send a message, the option 'Templates' will appear on the right side of your screen. All your saved templates will be displayed in a drop-down menu by clicking on it.
#### Personalisation
You can customise your SMS per end-user using personalised fields to make your SMS feel less generic and impersonal.
When your list of contacts is complete, you can use the parameters to automatically personalise your message. The fields available are:
* Name
* Surname
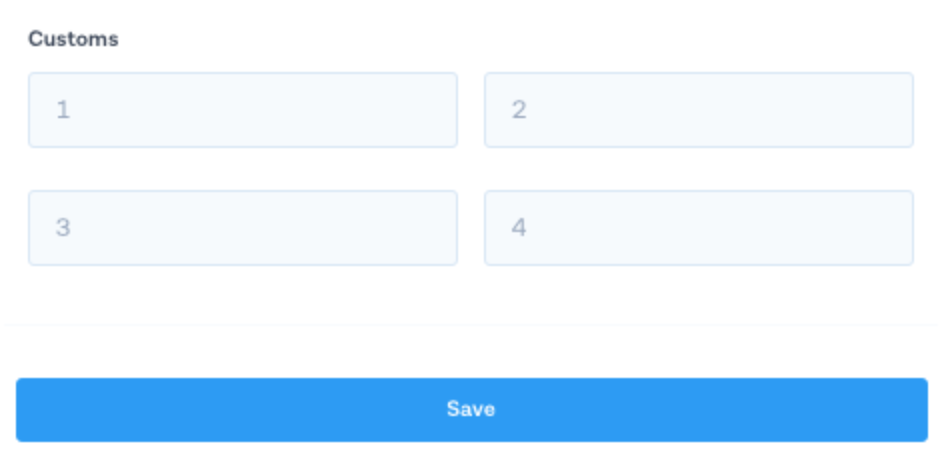
* 4 custom fields - These allow you to add for example an order number, the name of a purchased item, a location, a meeting time, the number of days until an event; basically, anything you want to add to your message to make your campaign more personal.
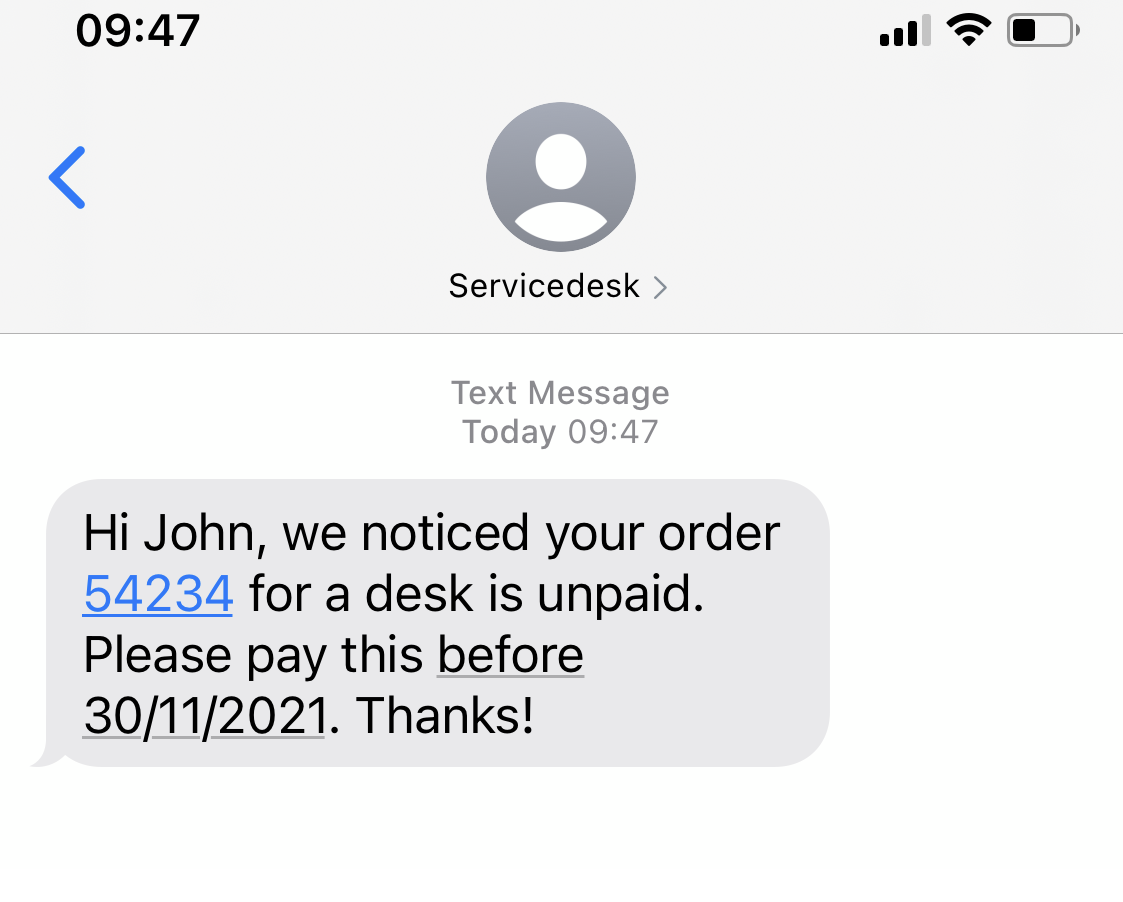
You may send an SMS like this:
Which will arrive like this on the end user's phone as below:
**Using personalisation**
To use personalisation in your SMS, you need to make personalised parameters are added alongside your contacts information.
**Single contacts**
When uploading single contacts, you will be able to enter personalised information in the custom fields in the contact card.
**Importing contacts**
When importing contacts via a file, you can create additional columns containing personal information. For example, in a column named 'Order Number' you can enter the order number for each of your end users. When you import your file, your personalised columns should appear along with other imported information such as the phone number and name. Below we have an example of what your file might look like:
**Bulk messaging**
When using Bulk Messaging, you can add the personalised information as additional columns in your file. Read more about Bulk Messaging here: [Bulk Messaging](https://docs.bird.com/connectivity-platform/sending-sms/sending-sms-in-bulk)